The two cables on a Raspberry Pi 5
You have an Acorn and a Raspberry Pi 5, and want to build the two cables between them, fit them and check them. An Acorn on a Compute Blade has its own guide; nothing there is for a Raspberry Pi 5.
This procedure is waiting for its bench run: issue #218.
What you will have
Two short cables from the Acorn’s two connectors to the Raspberry Pi 5 with the Waveshare PoE M.2 HAT+ (B). The P1 cable carries JTAG. The P2 cable carries the serial port and two spare GPIOs.
GND, TCK, TDO, TMS, TDI, K2, J2, J5 and H5 are the names on the pictures for each wire. K2, J2, J5 and H5 are the FPGA’s pin names.
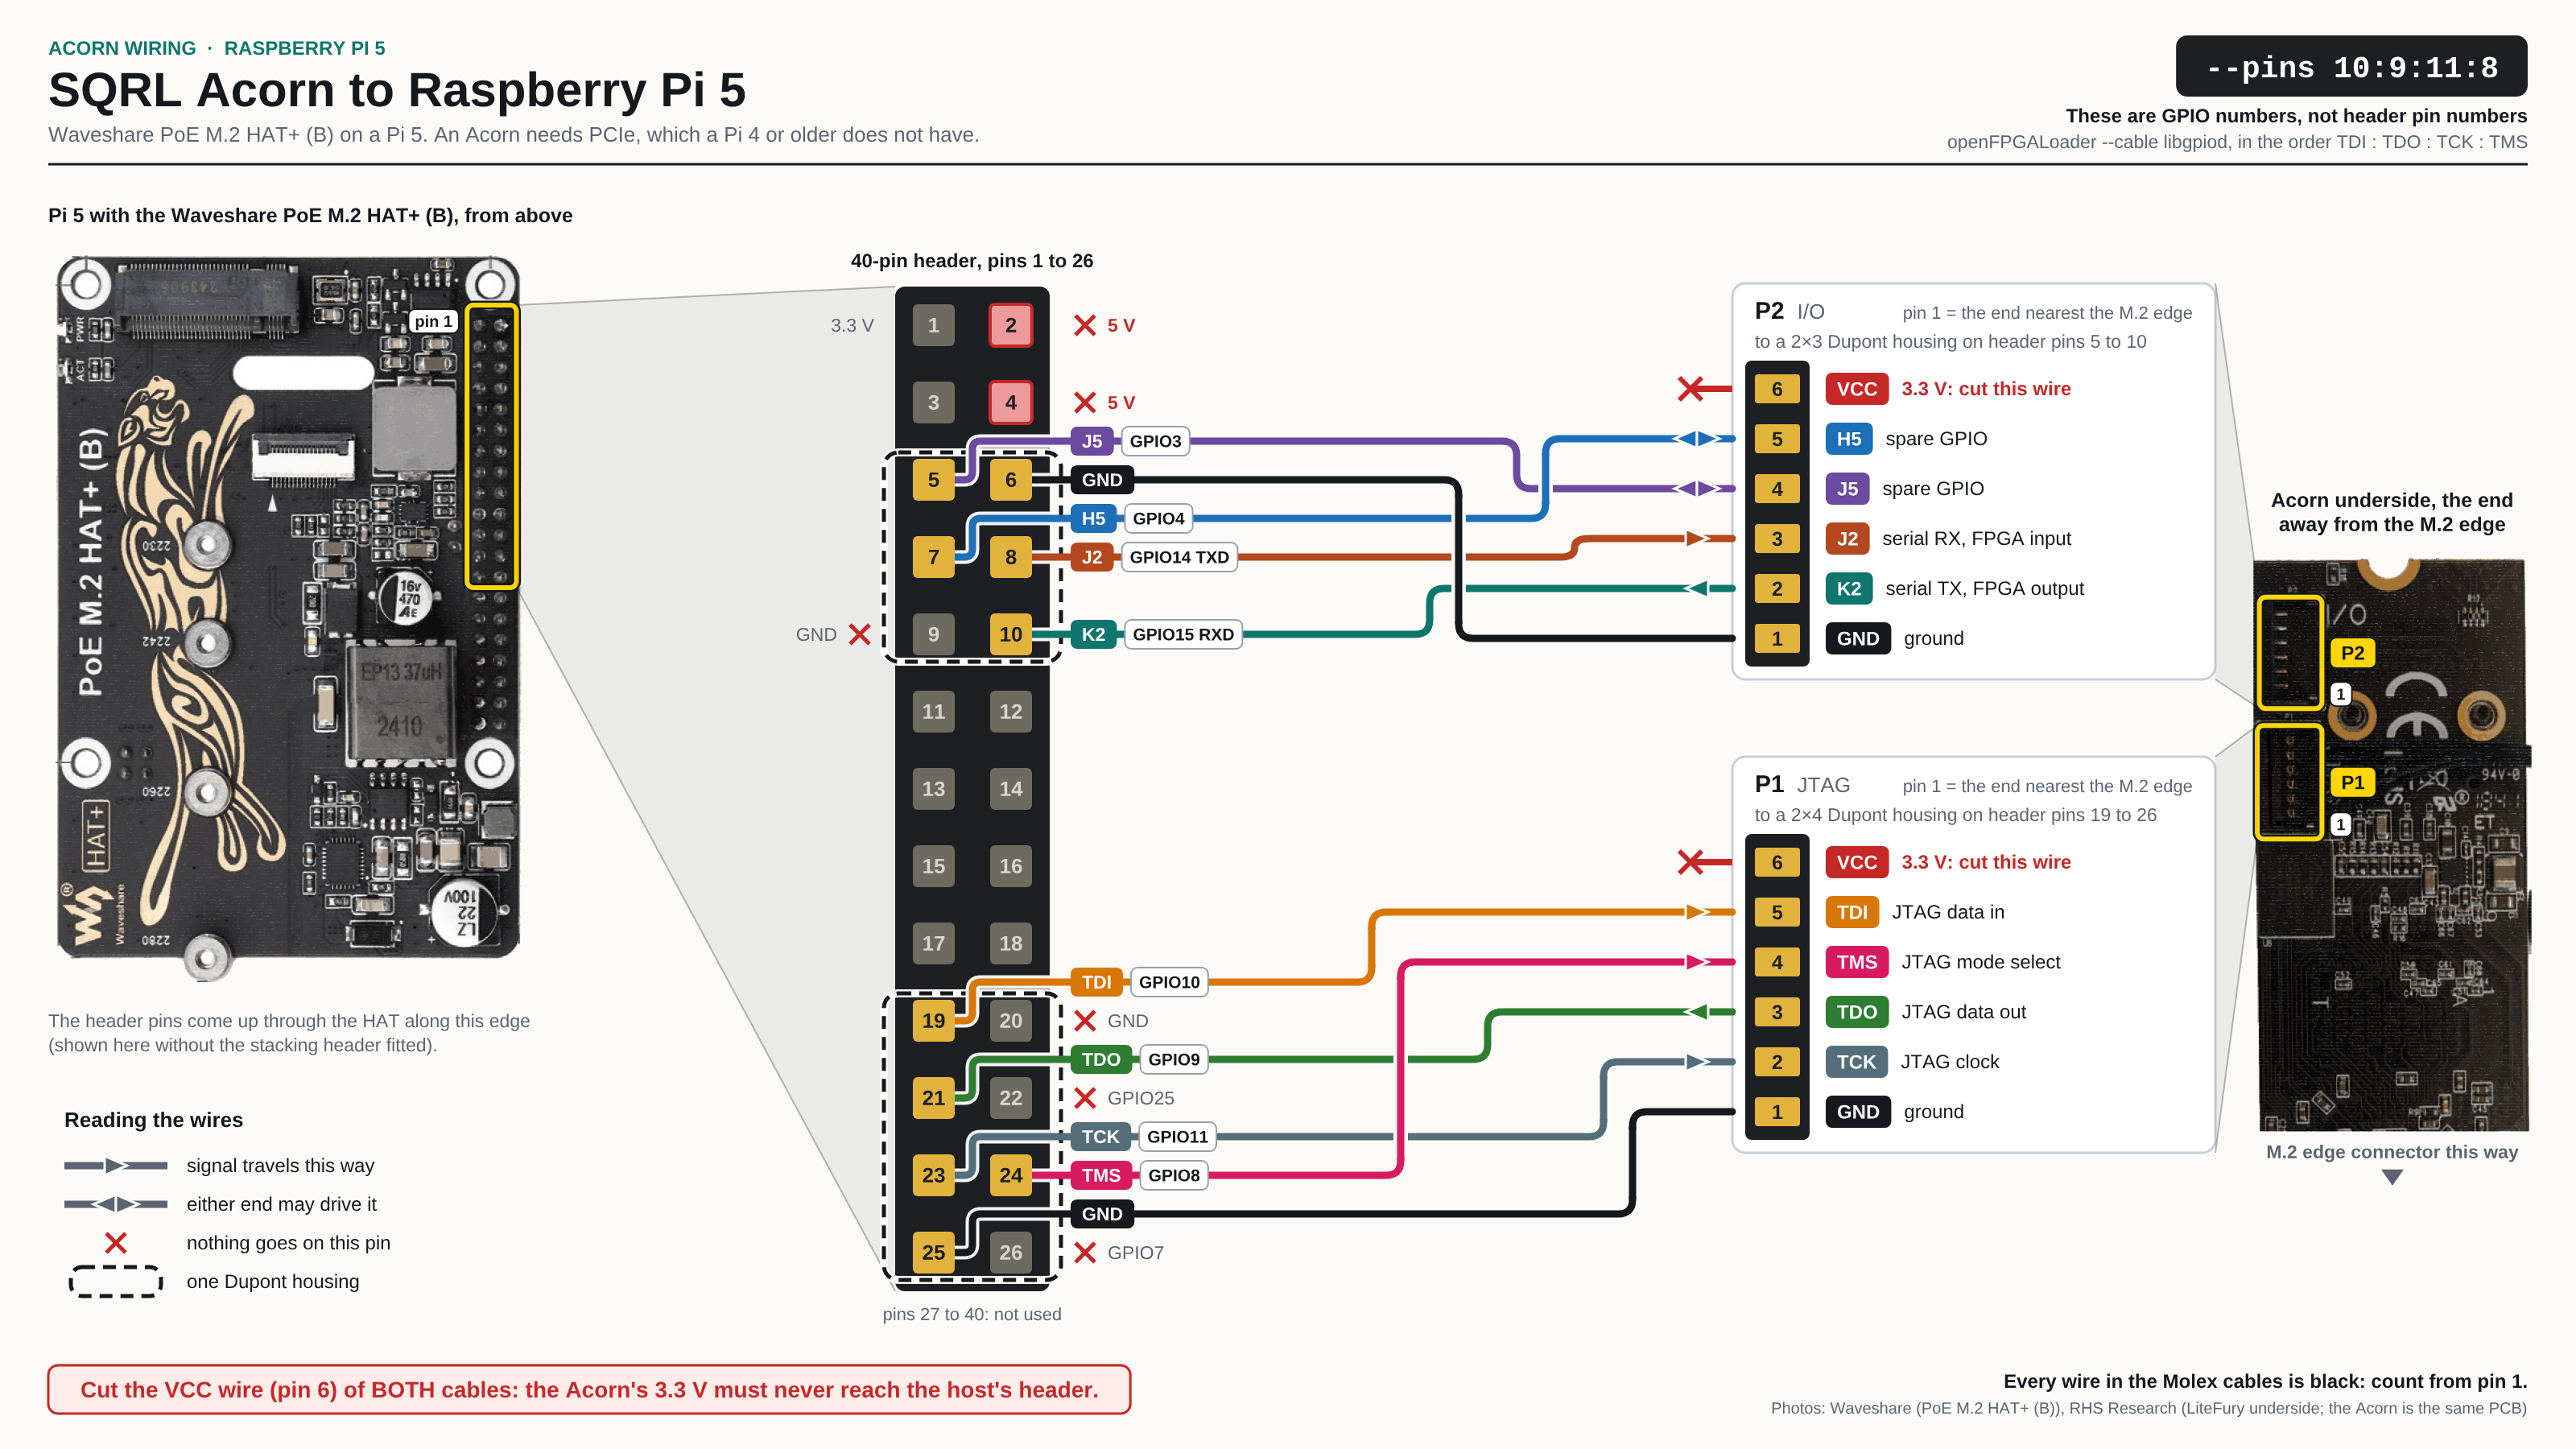
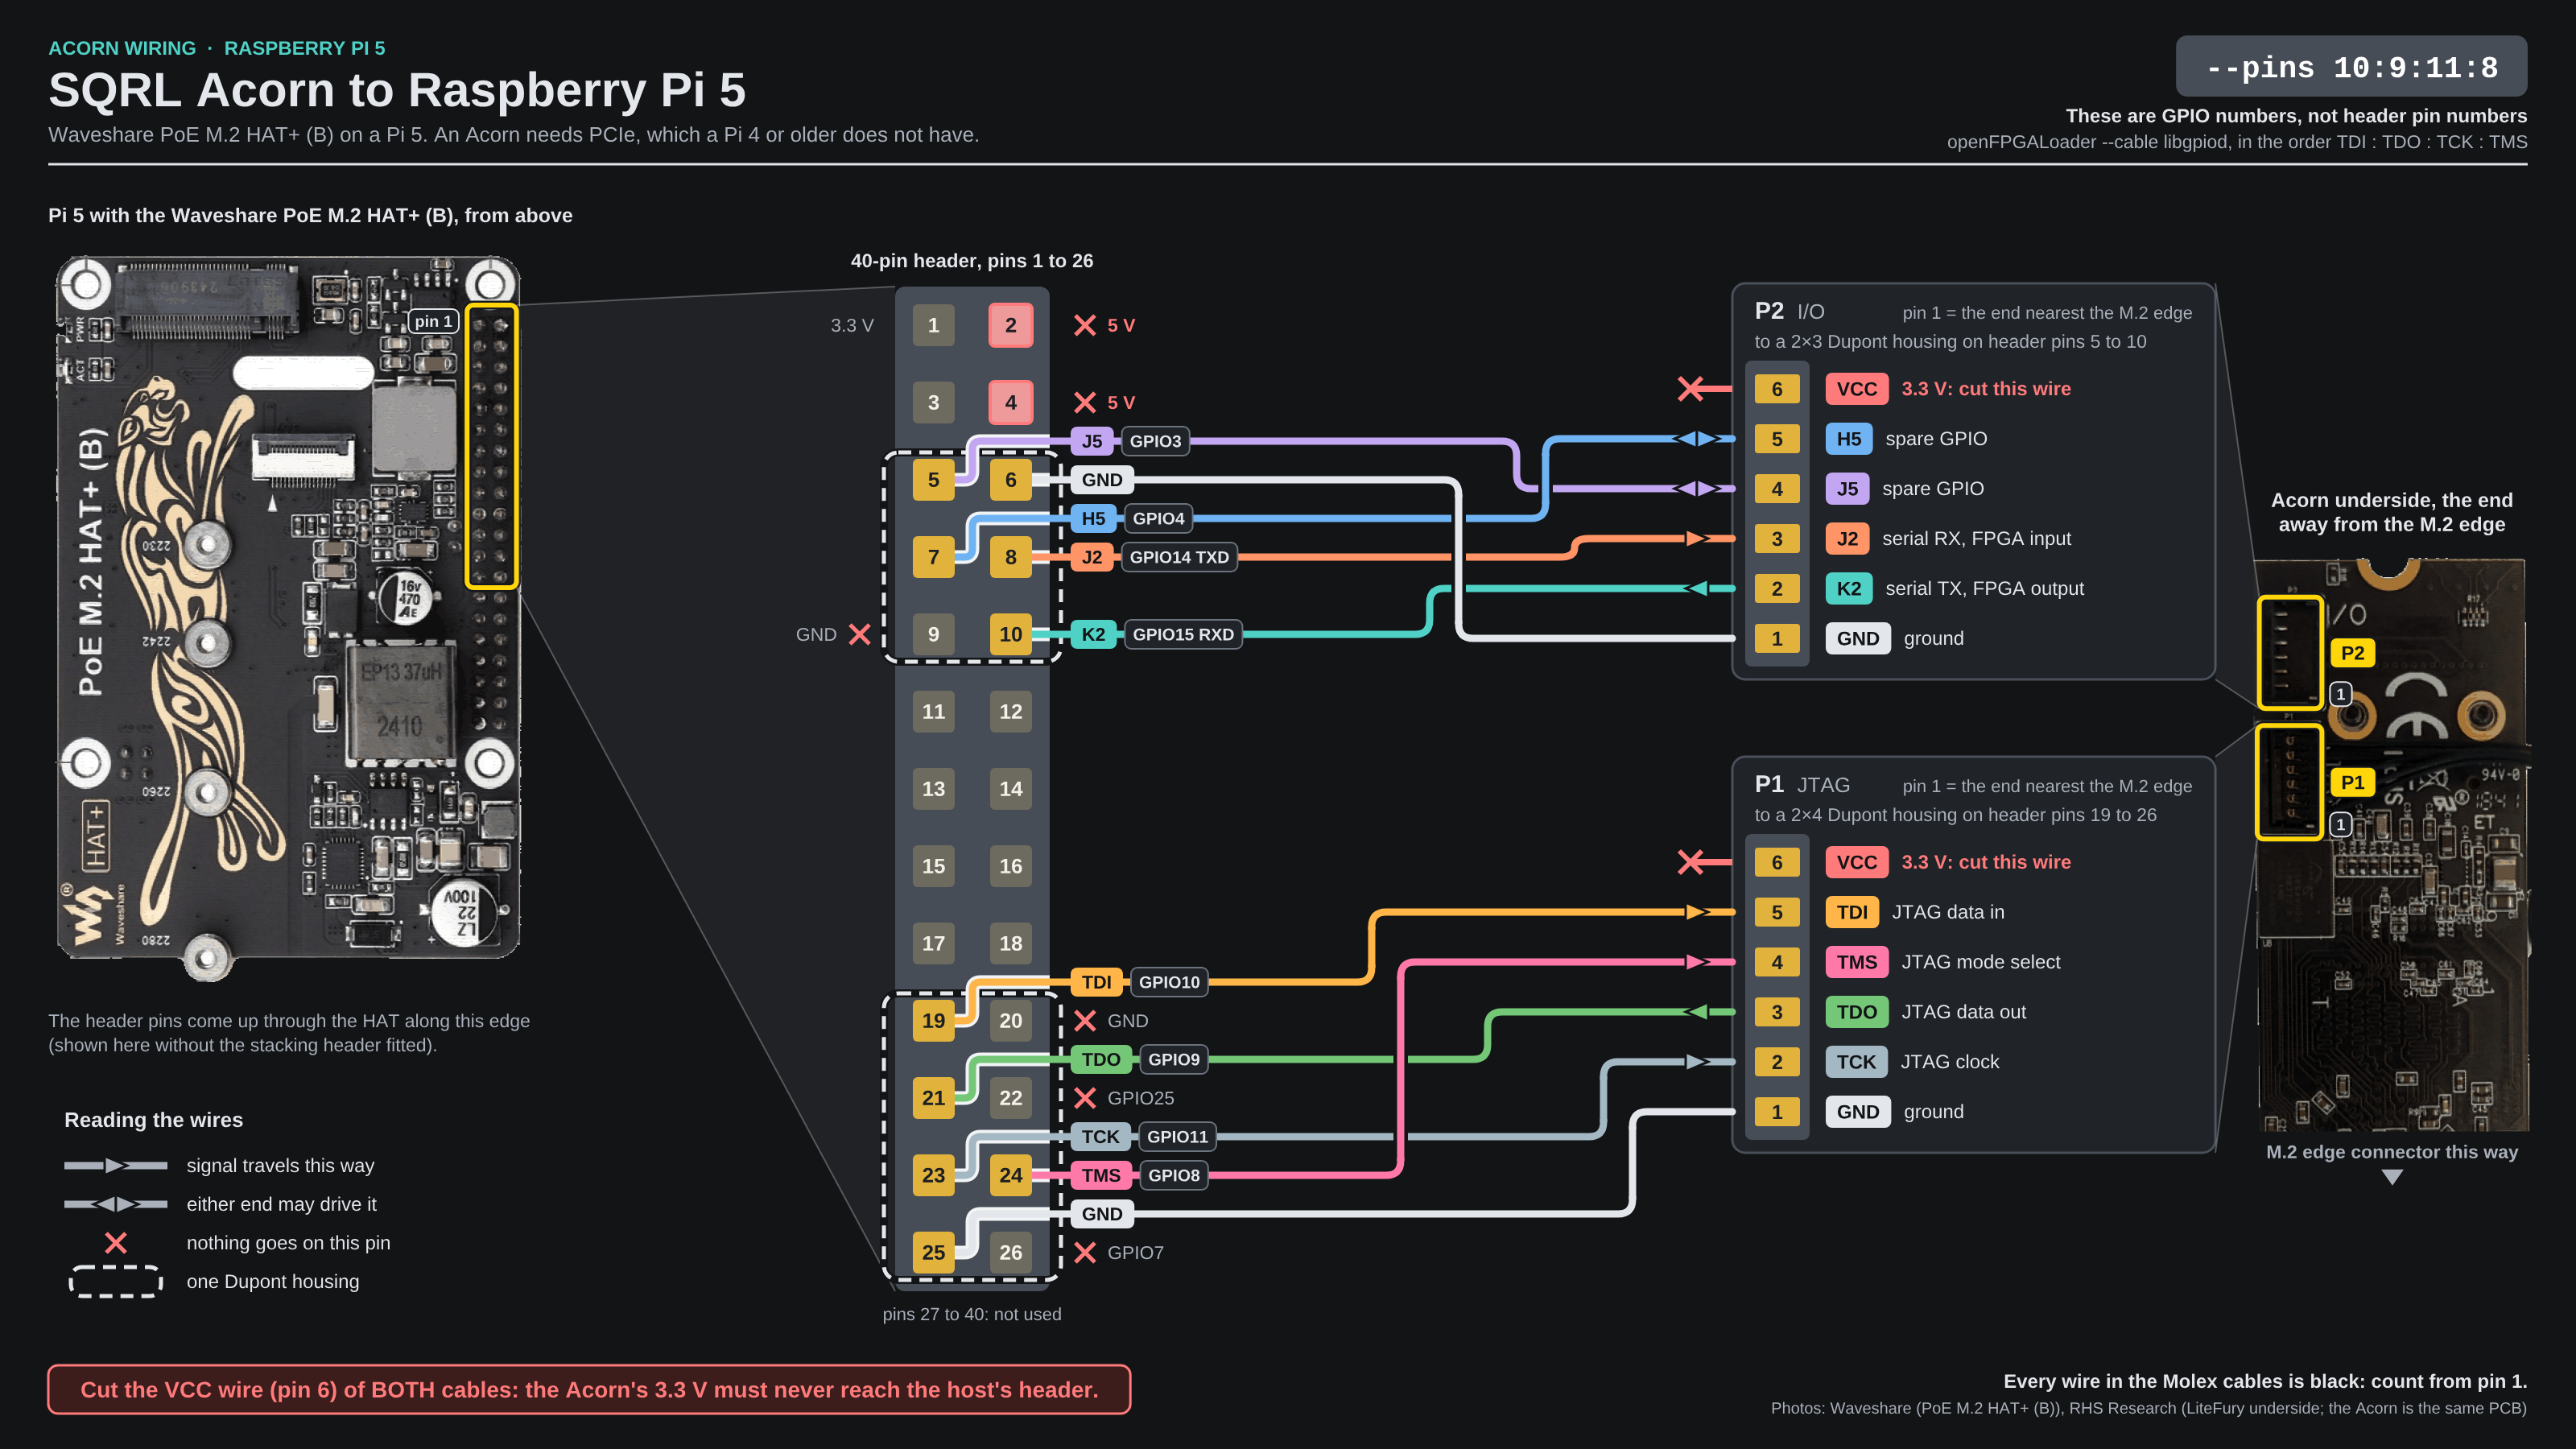
Nothing in this guide cuts a wire to length. Step 2 of How to prepare the JTAG cable’s wires (Raspberry Pi 5) is the reach check. Each half must reach from the card to the Raspberry Pi 5’s headers. That is before the cable is cut, and before any wire is cut back or crimped.
The bought cable is then cut in half, once, in step 3 of that page. That is before the meter check, which needs the cut faces.
Each half is then used at the length it has. The exception is the wires that are cut back at the plug.
The order of work
Parts and tools for the Raspberry Pi 5 cables: the list to tick off before starting.
How to prepare the JTAG cable’s wires (Raspberry Pi 5): each half of the cable checked for reach, and the cable cut in half. Then the P1 cable’s wires flagged, checked with a meter, cut back and crimped.
How to fill the JTAG cable’s housing (Raspberry Pi 5): the P1 cable’s housing filled and checked.
How to prepare the UART cable’s wires (Raspberry Pi 5): the P2 cable’s wires flagged, checked with a meter, cut back and crimped.
How to fill the UART cable’s housing (Raspberry Pi 5): the P2 cable’s housing filled and checked.
How to check the cables on the bench (Raspberry Pi 5): both cables checked on the host before power, the card out of its slot.
How to fit the cables and the card (Raspberry Pi 5): the plugs, the card and the housings go in. Then the check is run on the host, as in How to run the Acorn check on a Raspberry Pi 5. A failing line is followed to its wire in A failing Acorn test on a Raspberry Pi 5.
Photos: Waveshare (PoE M.2 HAT+ (B)), RHS Research (LiteFury underside; the Acorn is the same PCB).
The pages that build the cables
- Parts and tools for the Raspberry Pi 5 cables
- How to prepare the JTAG cable’s wires (Raspberry Pi 5)
- How to fill the JTAG cable’s housing (Raspberry Pi 5)
- How to prepare the UART cable’s wires (Raspberry Pi 5)
- How to fill the UART cable’s housing (Raspberry Pi 5)
- How to check the cables on the bench (Raspberry Pi 5)